I'm sure there are a billion things out on the web that show how to repurpose a printer. But I'm doing this for the purpose of making that damned CNC machine that the CD Drives just weren't good enough to do. I bought four of them and, wouldn't you know it, only two of them had stepper motors in them. That's okay though, because I still got the other two motors out (a brushless, and a DC) and kept the other laser movement motors just in case. I said I'd be taking the laser apart, and I have, and I'll post that next time. But let's just say that I didn't get any of them to light up like I had planned to. In fact, one of the chips on the laser box kinda blew up. So yeah, the whole laser thing is bust. But hey, we got this neat printer to take apart!


Meet the Epson Stylus Photo 280. It's just a printer. Not an all-in-one, unfortunately. These things are typically treasure troves for salvage. If it was a scanner, even more so, but unfortunately, this one isn't. I'll be quickly going over the disassembly of the printer here.
Step 1 - Take out the ink
These will just make everything messy, so just get rid of them. Watch out for gold and left over ink in the cartridge holder.
Step 2 - Remove every screw you can find
Working from the outside in, start to tear it apart. Don't use brute force yet as there may be ink lurking in the shadows of the printer. You also don't want to break any of the good stuff. It took about 4 screws to get the top off of this model.
Then it became clear that the drive motor is yet another
DC MOTOR. It keeps its precision by keeping track of where it is on a ribbon along the back with small dashes. The reader of this ribbon is in the cartridge holder, so now I know I can't be reckless with that.
On the side there was this really neat gear assembly.
Next I moved my attention to the logic board on the other side. I unscrewed everything, but it still wouldn't come out. I had to unplug everything from it first because each connection is custom fit for this printer. At last, after removing all of the deceptively strong tape, the box came free. I'll get back to this.
Next, I tried to get the ink reservoir up. I was not expecting something that looked like a maxi pad dispenser, but it did the job and was probably less messy. So I attacked every screw I could find. There was a piece of surgical tubing attached to it so I was worried if it was filled with ink or not. Once I was able to get it out, it looks like it wastes a lot of ink in the reservoir.
I kept unscrewing screws then suddenly I was able to take the inside out of the bottom part! This was exciting, because now I could get at all of the screws I couldn't before.
Pretty soon it just started to fall apart. There weren't many screws left. Finally, I was able to get motors out and the cartridge holder and everything else out. Just keep unscrewing until there's nothing left.
Then you're ready to move on to the next step.
Step 3 - Exploration and Inventory
Here's everything that was taken out of the machine. It's quite a bit, so let's distill it down to the useful stuff and go through it.
There we go.
So, let's go through it by category.
From this printer, I got 10 springs, 41 screws (before any of the below, I'll probably end up with around 50) and a handful of gears. I also got a couple of nice metal bars (the largest one shown here). These will go in a bowl or something.
These print cartridges aren't good for much except a tiny bit of gold a making a mess. Pry off the contact pins then recycle them.
These are the various sensors of the printer. Here, we have an encoder and its strip, three limit switches, and an electric eye that detects if something is blocking it. These each have very nice ends on them for easy reuse.
The print cartridge holder was a bit harder to access than I thought it was going to be. I broke it down into three basic parts. The smallest part is the encoder along the long ribbon. The wide one is the print cartridge data channel (best name I could come up with) and the shiny part is the print head. I'm going to take the latter two apart more.
The print cartridge data channel can be broken down into two parts. The logic board and the contacts. You can get the gold off of the contact part easily.
Be careful with this one, there may be ink in here. I have no idea what the printer head is made of, but it looks cool with its tiny holes and whatnot. What you see pictured here is the other side of the print head. I couldn't get further than this because it was glued really well. So I just stopped here. It's really cool to think that this little simple device can make very sharp photos on a page from thousands of color combinations.
Word of warning when working with the above components. This stuff, being as it is ink, will stain everything it touches. I tried to use 100% acetone to get it out and it wouldn't come out. That's how hard core this stuff is. Now that's out of the way, let's move on to the motors.
Upon testing these motors, I cranked them as high as my volt source would go: 24V, and they drew a cool 0.04A without load. These suckers were hard to slow down, their torque was very good. When I tried grinding away plastic with them, it got some of the way through and I was able to take the load all the way up to 0.34A. Not bad, these are definitely going to be of use to me.
I haven't talked about the power supply. I didn't know if there'd be anything useful in this. As you can see in the picture, there are a few capacitors (from right to left: 180μF, 33μF, 1500μ), a fuse, some resistors that I didn't bother reading and other components. It may be useful if I need to step down 120V to something that this produces. I don't know what that'd be, but I may test it later.
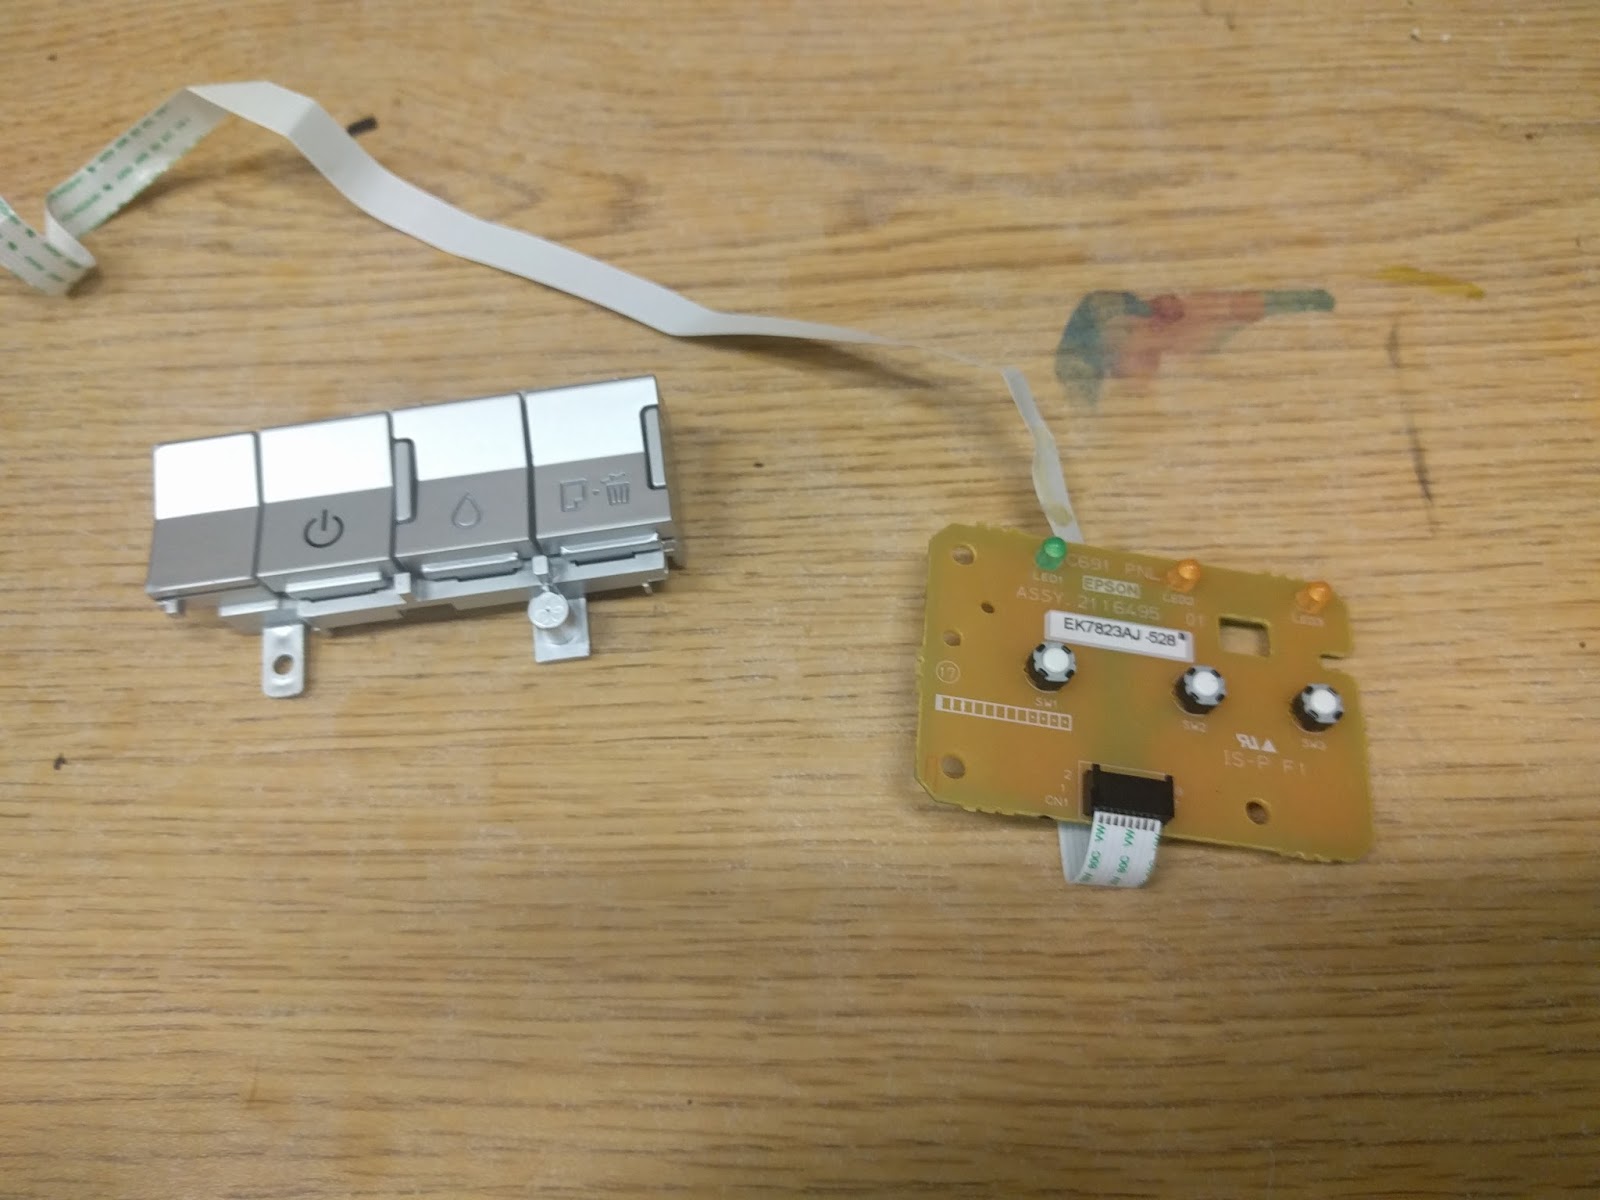
This was a whole lot simpler than I thought it was going to be. But it's just three buttons and three LEDs, and the printed circuitry on the back clearly shows the pinout of the ribbon cable.
Now, the moment we've all been waiting for. The main brain. This is exactly what I thought it would be. The biggest and probably most important chip on here is the Epson Printer SoC, the Realoid.
This link is the best I could find on it. This specific one is an E01A69BE. Another chip caught my eye because I recognized the brand name for once: Hynix. I accidentally bought fully buffered Hynix RAM before, so I was sure this was some kind of memory chip.
And I was right! This datasheet is only one letter off from the chip we have. But it looks like all of the similar chip number mean the same thing for capacity: this printer had 64MB of Synchronous DRAM. Not bad! There was also
this driver chip and
this CMOS boot chip. These are the four main chips on the board, and they basically make this printer more than just a dummy machine, it's a full blown computer.
In all, printers are great fun to take apart and you can get some really neat stuff out of them. This one was lacking in features, but was still great to take apart nonetheless. Just make sure you're not wearing your favorite shirt because it can get super messy.


Hi, very interesting post, kind of old but still good. I have like 5 printers useless, the head printer is blown and digging on the mainboard is really interesting. These are WF-5190 printers, the mainboar has a Realoid processor, 2 modules of 2GB DDR3 RAM, internal SD reader with a SD card in it. Seems like a real computer, having 1GB LAN port and 3 USB. Even a USB WI-FI module is connected to one of it's internal USB port.
ReplyDeleteIt would be awesome to run some kind of something on it, I'm pretty sure it's almost like a computer and probably runs linux. Do you have some information about someone modifying its OS?
I think your best chance is trying to find a serial debug port on the board and trying to get a root terminal on it. I've had varying levels of success doing this. Another approach (slightly harder) would be to find vulnerability in the firmware that allows for arbitrary command execution so you can start a privileged telnet or ssh server. Best of luck!
Delete